

How To Get To Three Point Pass
This is a list of Pokemon that appear in the 3-Point Pass surface area in the Crown Tundra DLC for the games Pokemon Sword and Shield. Read on for information on which Pokemon appear at that place, obtainable items, and more.
| Crown Tundra Wild Surface area Maps | |||
|---|---|---|---|
 Slippery Slope Slippery Slope | 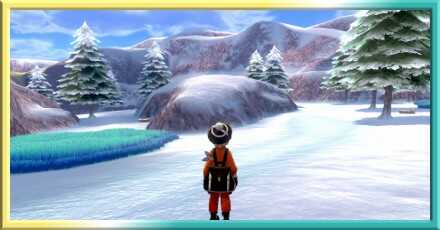 Frostpoint Field Frostpoint Field | 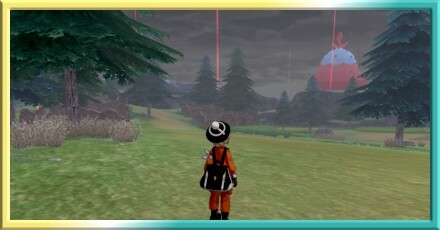 Behemothic's Bed Behemothic's Bed | |
 Erstwhile Cemetery Erstwhile Cemetery | 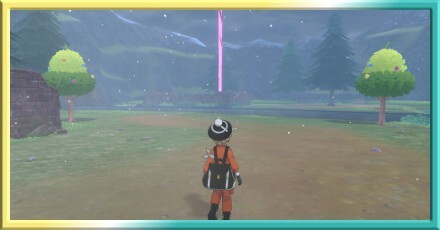 Giant's Foot Giant's Foot | 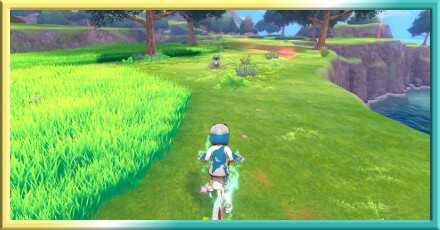 Ballimere Lake Ballimere Lake | |
 Dyna Tree Hill Dyna Tree Hill |  Frigid Sea Frigid Sea | Three-Indicate Pass | |
 Snowslide Gradient Snowslide Gradient |  Path to the Peak Path to the Peak | 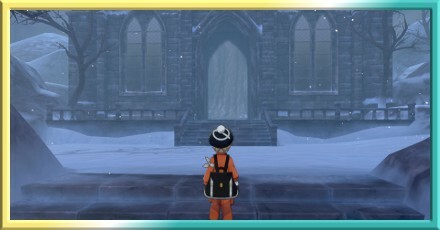 Crown Shrine Crown Shrine | |
 Lakeside Cave Lakeside Cave |  Roaring-Sea Caves Roaring-Sea Caves |  Tunnel to the Top Tunnel to the Top | |
Listing of Contents
- Three-Betoken Laissez passer Maps
- Items and Of import Locations
- Max Raid Den Locations
- Three-Signal Pass Max Raid Dens
- Visible Encounters in 3-Point Laissez passer
- Random Encounters in Three-Signal Pass
- Special Overworld Locations Encounters in Three-Point Pass
- Obtainable Items in Three-Point Pass
- Related Guides
Three-Signal Laissez passer Maps
All Items, Characters and Of import Locations
 Enlarge
Click for a full list of items and important areas you can notice in 3-Betoken Pass!
All Crown Tundra Maps
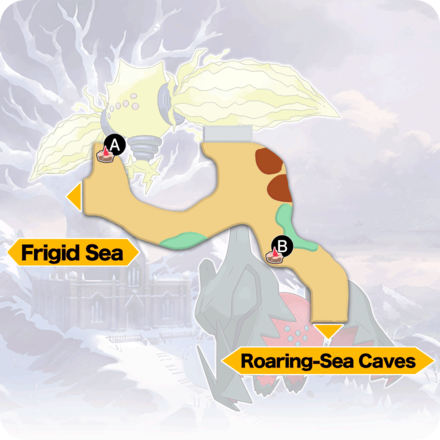
Max Raid Den Locations
 Enlarge
Pokemon will appear in the Dens above for Max Raid Battles. Both of the Dens in the 3-Signal Laissez passer area take Gigantamax Pokemon available in them!
Three-Signal Pass Max Raid Dens
Enlarge
| List of Dens (Click to Jump!) | ||
|---|---|---|
| ▼ Den A | ▼ Den B | |
Max Raid Den A
Enlarge
| Normal Den | |
|---|---|
| Hidden Ability: Yeah | Hidden Ability: No |
| Hidden Ability: No | Hidden Ability: Yes |
| Hidden Power: Aye | Hidden Ability: No |
| Hidden Ability: No | Hidden Ability: No |
| Hidden Ability: No | Hidden Ability: Yes |
| Subconscious Ability: No | |
| Rare Den | |
| Hidden Ability: Yes | Hidden Ability: Yes |
| Hidden Power: Yes | Hidden Ability: Yes |
| Hidden Ability: Yes | Hidden Ability: Yes |
| Hidden Ability: Aye | Hidden Ability: Yep |
| Hidden Ability: Yes | Subconscious Power: Yes |
| Hidden Ability: Yeah | Hidden Power: Yes |
| Hidden Power: Yes | Hidden Ability: Yes |
Max Raid Den B
Enlarge
| Normal Den | |
|---|---|
| Hidden Ability: Yep | Hidden Ability: No |
| Hidden Power: Yes | Hidden Ability: No |
| Hidden Ability: Aye | Subconscious Ability: No |
| Hidden Ability: Yep | Hidden Ability: Yeah |
| Hidden Ability: Aye | |
| Rare Den | |
| Subconscious Ability: Yeah | Hidden Ability: Yep |
| Hidden Power: Yep | Hidden Ability: Yep |
| Hidden Power: Aye | Hidden Ability: Yes |
| Subconscious Ability: Yes | Subconscious Power: Yeah |
| Hidden Ability: Yeah | Hidden Power: Yes |
Visible Encounters in Three-Point Pass
Clear (Visible)
| Audino Rare | Avalugg Common | Bronzong Common |
| Claydol Uncommon | Dubwool Uncommon | Golurk Uncommon |
Cloudy (Visible)
| Audino Rare | Avalugg Mutual | Bronzong Common |
| Claydol Uncommon | Phantump Uncommon | Swablu Uncommon |
Pelting (Visible)
| Araquanid Common | Audino Rare | Avalugg Uncommon |
| Bronzong Mutual | Claydol Uncommon |
Thunderstorm (Visible)
| Araquanid Uncommon | Audino Rare | Avalugg Common |
| Bronzong Common | Claydol Uncommon | Electabuzz Uncommon |
| Galvantula Uncommon |
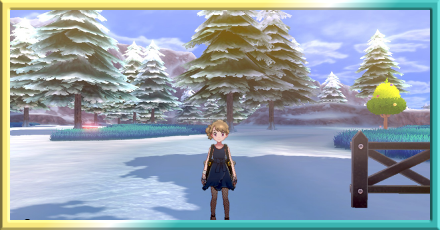
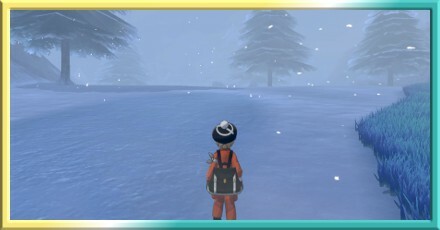
Snow (Visible)
| Audino Rare | Avalugg Common | Bronzong Common |
| Claydol Uncommon | Cryogonal Uncommon | Vanillish Uncommon |
Snowstorm (Visible)
| Absol Rare | Audino Uncommon | Avalugg Uncommon |
| Bronzong Common | Claydol Uncommon | Cryogonal Uncommon |
| Vanillish Rare |
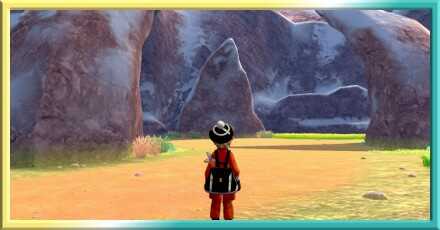
Sunny (Visible)
| Audino Rare | Avalugg Uncommon | Bronzong Uncommon |
| Claydol Uncommon | Druddigon Uncommon | Dubwool Uncommon |
| Durant Rare | Heatmor Rare | Magmar Uncommon |
Fog (Visible)
| Audino Rare | Avalugg Common | Bronzong Common |
| Claydol Uncommon | Golurk Uncommon | Hattrem Uncommon |
| Mimikyu Rare |
Random Encounters in Three-Point Laissez passer
Articulate (Random)
| Bergmite Common | Bronzor Common | Mime Jr. Common |
| Wooloo Common |
Cloudy (Random)
| Bergmite Common | Bronzor Common | Mime Jr. Mutual |
| Phantump Mutual |
Rain (Random)
| Bergmite Mutual | Bronzor Common | Dewpider Common |
| Mime Jr. Common |
Thunderstorm (Random)
| Bergmite Uncommon | Bronzor Uncommon | Dewpider Uncommon |
| Elekid Uncommon | Mime Jr. Uncommon |
Snow (Random)
| Bergmite Mutual | Bronzor Mutual | Mime Jr. Common |
| Vanillite Common |
Snowstorm (Random)
| Bergmite Mutual | Bronzor Common | Mime Jr. Common |
| Vanillite Common |
Sunny (Random)
| Bergmite Uncommon | Bronzor Uncommon | Magby Uncommon |
| Mime Jr. Uncommon | Wooloo Uncommon |
Fog (Random)
| Bergmite Common | Bronzor Common | Hatenna Common |
| Mime Jr. Common |
Special Overworld Locations Encounters in Three-Signal Laissez passer
Articulate (Visible)
| Dragapult | Golurk |
Cloudy (Visible)
| Dragapult | Golurk |
Rain (Visible)
| Dragapult | Golurk |
Thunderstorm (Visible)
| Electivire | Golurk |
Snowfall (Visible)
| Dragapult | Golurk |
Snowstorm (Visible)
| Dragapult | Golurk |
Sunny (Visible)
| Dragapult | Golurk |
Fog (Visible)
| Dragapult | Golurk |
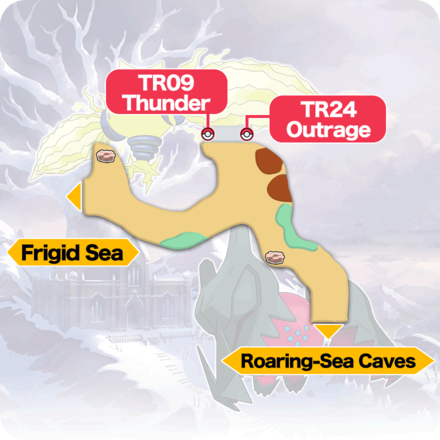
Obtainable Items in Three-Indicate Pass
Listing of TRs
| No. | Movement | Location | Price |
|---|---|---|---|
| TR09 | Thunder | Found near the temple archway north of the map. | - |
| TR24 | Outrage | Found about the temple entrance north of the map. | - |
Related Guides
Wild Area and Raid Strategy
 Wild Area and Raid Strategy
The Crown Tundra Maps
| Crown Tundra Wild Area Maps | |||
|---|---|---|---|
| Slippery Slope | Frostpoint Field | Giant's Bed | |
| Sometime Cemetery | Giant's Pes | Ballimere Lake | |
| Dyna Tree Hill | Frigid Bounding main | 3-Point Laissez passer | |
| Snowslide Slope | Path to the Acme | Crown Shrine | |
| Lakeside Cave | Roaring-Bounding main Caves | Tunnel to the Top | |
The Isle of Armor Maps
| Isle of Armor Wild Area Maps | ||
|---|---|---|
 Fields of Laurels Fields of Laurels |  Soothing Wetlands Soothing Wetlands | 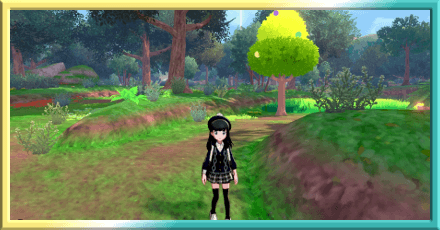 Forest of Focus Forest of Focus |
 Challenge Beach Challenge Beach | 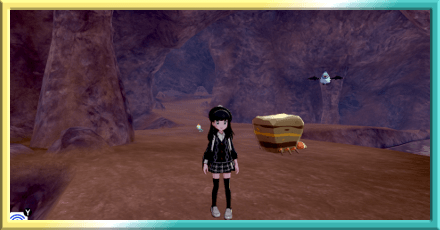 Brawlers' Cave Brawlers' Cave |  Loop Lagoon Loop Lagoon |
 Stepping-Stone Sea Stepping-Stone Sea |  Insular Sea Insular Sea |  Honeycalm Isle Honeycalm Isle |
 Honeycalm Ocean Honeycalm Ocean |  Potbottom Desert Potbottom Desert |  Warm-Upwards Tunnel Warm-Upwards Tunnel |
 Training Lowlands Training Lowlands |  Challenge Route Challenge Route |  Courageous Cavern Courageous Cavern |
 Workout Sea Workout Sea | ||
The Island of Armor Wild Area
All Wild Area Maps
 Rolling Fields Rolling Fields |  Dappled Grove Dappled Grove |  Westward Lake Axewell Westward Lake Axewell |
 Axew's Heart Axew's Heart |  Giant's Seat Giant's Seat |  Due south Lake Miloch Due south Lake Miloch |
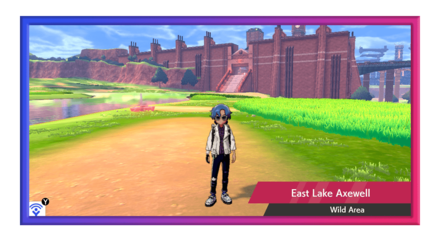 Eastward Lake Axewell Eastward Lake Axewell | 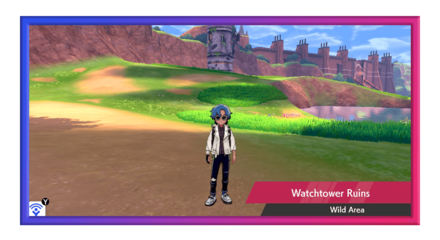 Watchtower Ruins Watchtower Ruins |  Motostoke Riverbank Motostoke Riverbank |
 Stony Wilderness Stony Wilderness |  Bridge Field Bridge Field |  Dusty Bowl Dusty Bowl |
 Giant's Mirror Giant's Mirror |  Giant's Cap Giant's Cap |  Lake of Outrage Lake of Outrage |
 Hammerlocke Hills Hammerlocke Hills |  North Lake Miloch North Lake Miloch |
All Raid Boss Locations

Location of Each Raid Dominate by Generation
Source: https://game8.co/games/pokemon-sword-shield/archives/305625
0 Response to "How To Get To Three Point Pass"
Post a Comment